Digital Capture Template Wizard
Settings > Accounts Payable > Digital Invoice Templates
Using the Digital Capture Template Wizard:
- Access the wizard by clicking Settings > Accounts Payable > Digital Invoice Templates.
- Highlight the Master Template.
- Click Edit.
- The Edit Digital Invoice Capture Template page will display

- Click Template Wizard.
- The Template Wizard file selection menu will open.
Step 1: Select images to create templates

- Files may be selected from the user’s computer or dragged/dropped into the menu, and when selected, will be listed in the menu.

- Click OK.
The Template Wizard will open and display the selected file(s). All templates are defaulted to A.I. templates. Deselect the checkbox if the templates created will be Manual templates.
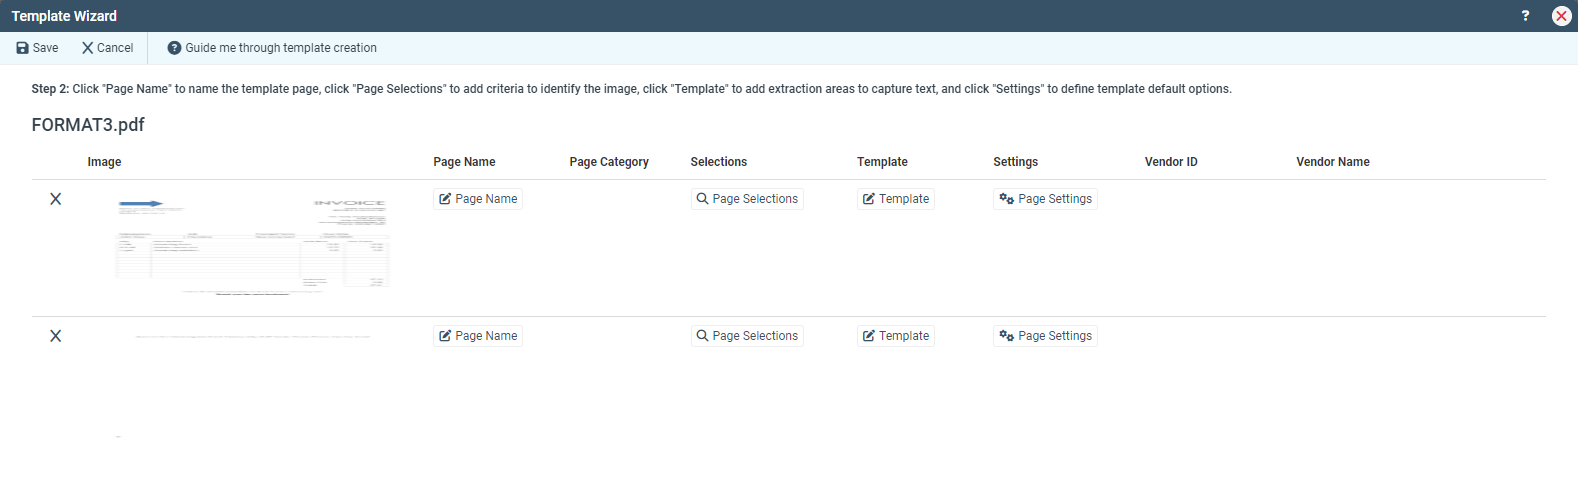
Step 2: Name the template page(s), add Page Selections, modify the template to identify information to capture, and define default options.
- Click Page Name.
- (Optional) Enter a template category (utilized in the template page list for reference purposes)
- Enter a Page Name to label the template page being created

- Click Save.
- Click Page Selections.
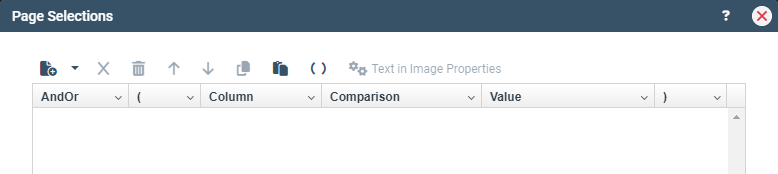
- These are the parameters used by the system to know when to apply the template instructions being created
- Click New icon:

- Select a column type:
- Text in Image: identifies a location in the image within which specific text should be present. If present, the system will apply the template instructions for Capture
- Image name: the name applied to the image upon capture. By default, image names are the original filename + .00000X.png, where X is the file's page number.
- File Name: the file name of the image being captured
- Select a comparison: how the specified column should be compared to the entered value
- (Default) Contains: the system will look for if the specified column merely contains the entered value
- Other options: Equal to, Not equal to, Greater than or equal, Greater than, Less than or equal, Less than, Does not contain, Begins with, Does not begin with, Ends with, Does not end with, Like, Not like, Is nothing, Is not nothing
- Multiple Page Selections may be entered to allow for multiple scenarios in which the template should be applied
- Click OK.
- Click Template.
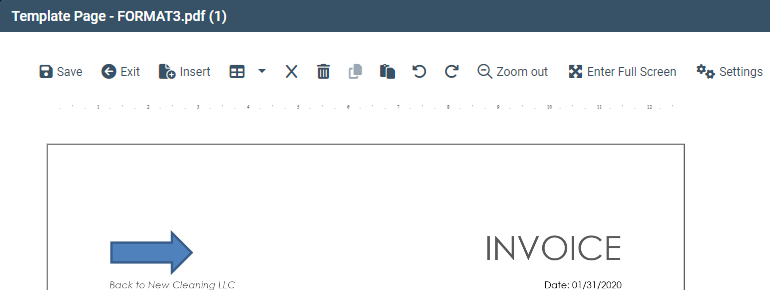
- Add all template extraction instructions (See “Adding Template Pages” steps for Adding Text Extraction Fields.
- Click Page Settings.
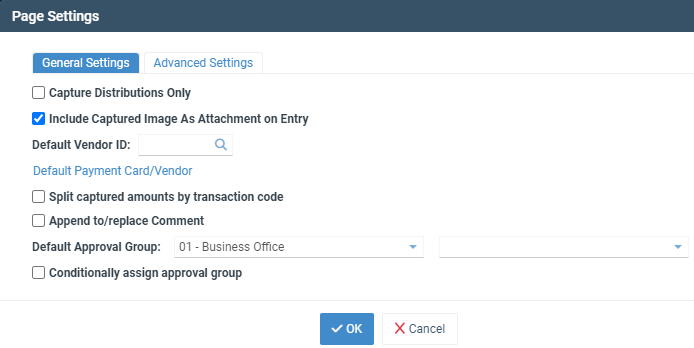
- Establish default settings (See Adding Template Pages steps for Settings (adding defaults).
- Click Save.
- The Edit Digital Invoice Capture Template screen will display the template(s) created using the Template Wizard.
- Click Save to store all changes made to the Master Capture Template.


