Adding Manual Template Pages
Settings > Accounts Payable > Digital Invoice TemplatesTo add template pages, complete the following steps:
- Access the Digital Invoice Templates page by clicking Settings > Accounts Payable > Digital Invoice Templates from the menu bar.
- Highlight the Master Template.
- Click Edit.
- The New Digital Invoice Capture Template page will display:
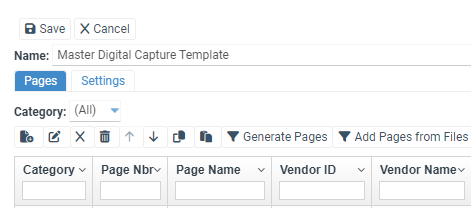
- Click the New icon:

- The New Template Page screen will display:

- Click Upload Template Image.
- The Select Template Image file selection screen will display:
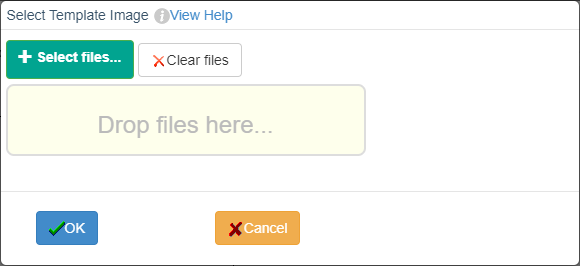
- Click +Select Files to pull a document from a file location or drag and drop a file in the yellow Drop files here… box.
- The selected file name will be displayed as having been selected:
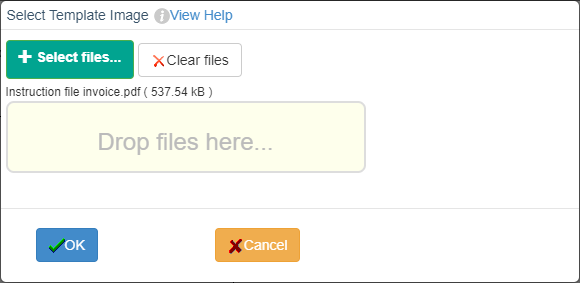
- Click OK.
- If the invoice file selected contains multiple pages, the Select Foundation Image screen will display where you will select the page from which information will be extracted:
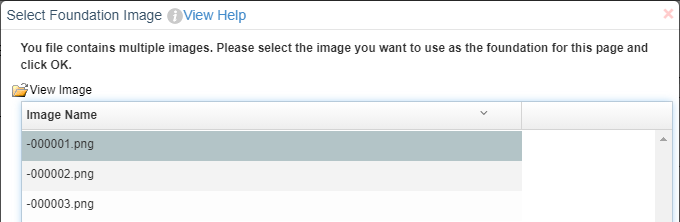
- When determining which page to select, you may view its image by highlighting the page number and clicking View Image. The image will be displayed in a new browser tab.
- Once the desired page has been highlighted, click OK.
- You will be returned to the New Template Page, and the image will be displayed in Zoom in format. To display the entire image, click Zoom out:


Adding Text Extraction Fields
Text Extraction fields tell the system which locations you can find your desired information. To add them to the image, complete the following steps:
- Click
 from the menu bar.
 - A menu will display containing invoice entry sections for which information can be extracted:
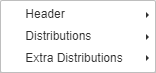
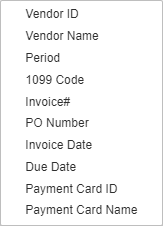
- The Header section contains fields for the invoice header:
- The Distributions section contains fields for GL Distribution lines:

- Information extracted is added to the first GL Distribution line of the resulting invoice.
- Each field may be used only once.
- The Extra Distributions section contains fields for additional GL Distribution lines:
- Information extracted is added to supplemental GL Distribution lines of the resulting invoice.
- Fields may be added to the template page as many times as necessary, each resulting in an additional supplemental GL Distribution line.
- Information extracted using these fields is placed into the respective field in the invoice created through the Capture process. All fields are not required to be used but are available if needed.
- Select the desired field for which to extract information.
- An extraction box will be displayed on the invoice image:

- Move the box to the area of the image containing the information to be extracted.
- If placed in a specific location, the system will extract all information contained within the box limits.
 from the menu bar.


Locating Information Using Adjacent Text (Beside):
It is possible that the location of invoice information to be extracted can vary from invoice to invoice received from a vendor. In these circumstances, to improve the probability of extracting accurate information, you may use adjacent text to identify the information to be extracted. The following steps will describe how to use this process when the desired information lies to the right of adjacent text.
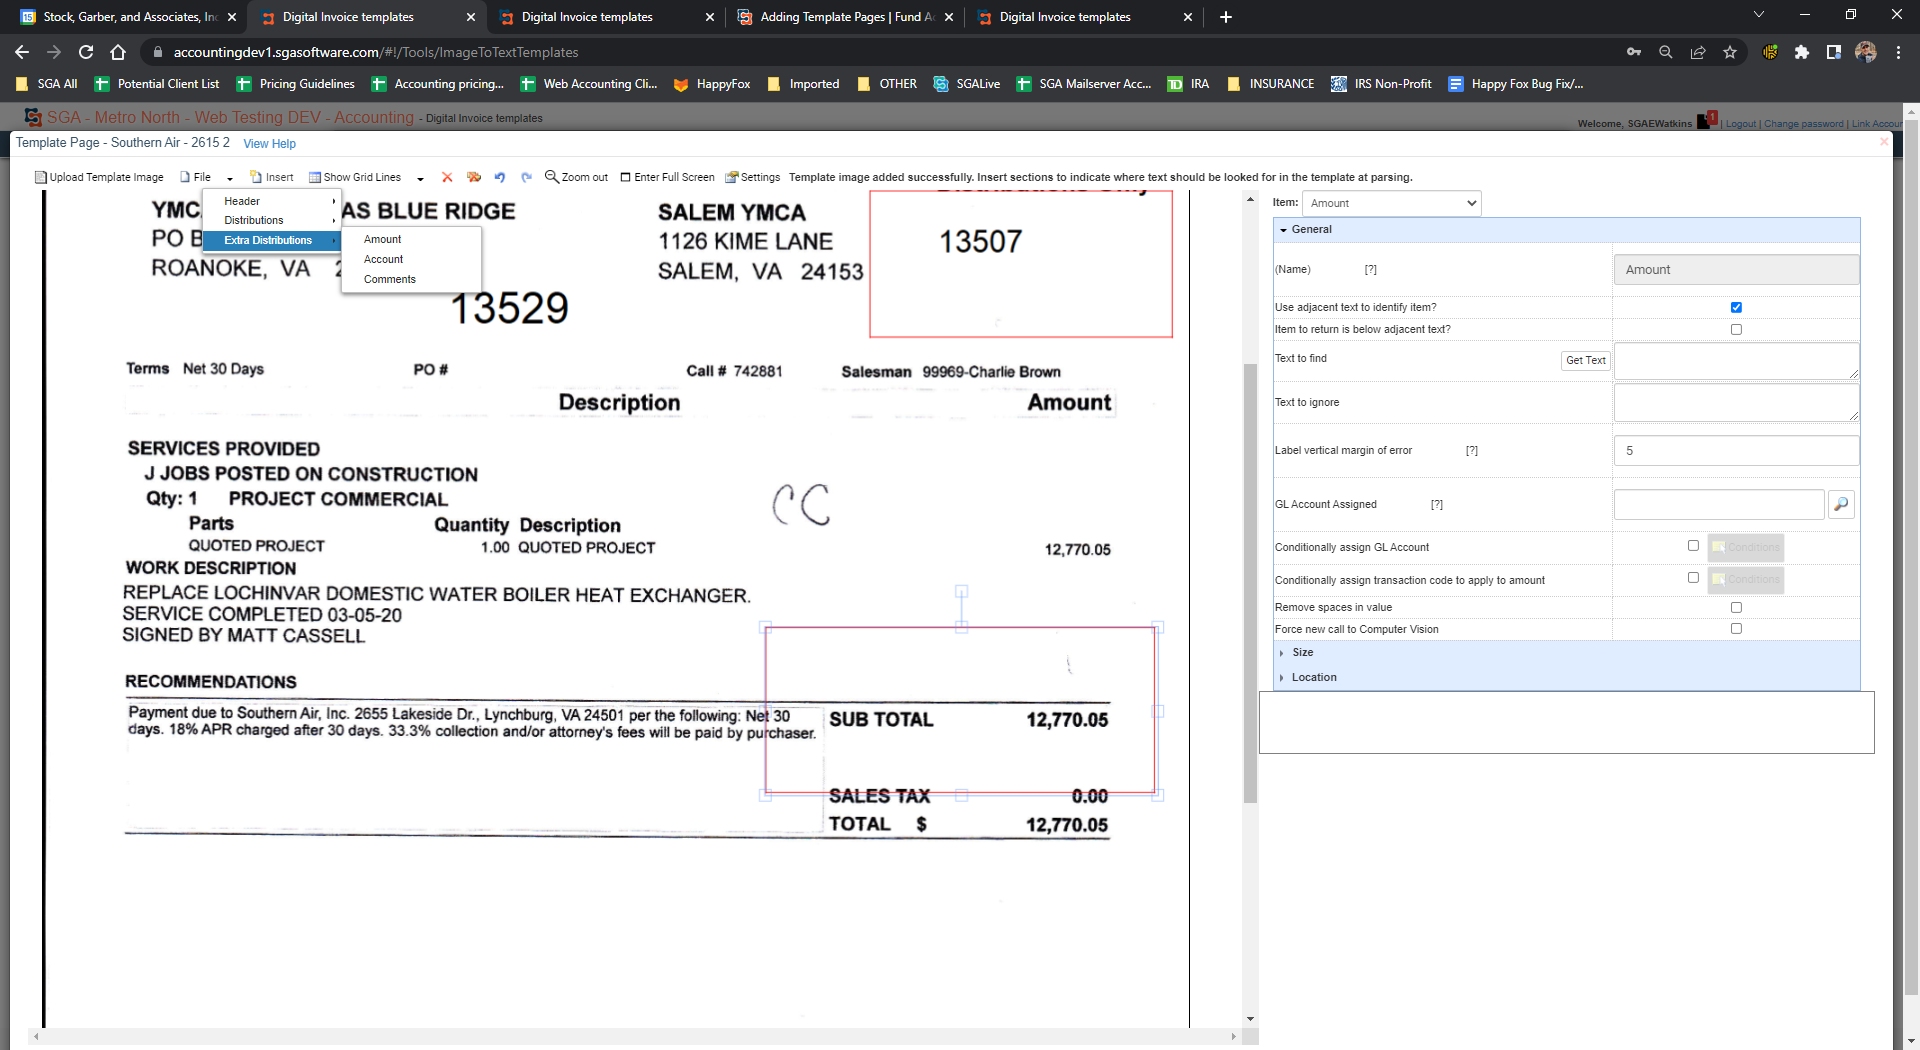
- Once the extraction box has been moved to the desired location in Step 7 above, expand its size to encompass an area large enough to cover anywhere the information to be extracted may reside:
- On the right of the screen, the extraction parameters are displayed:
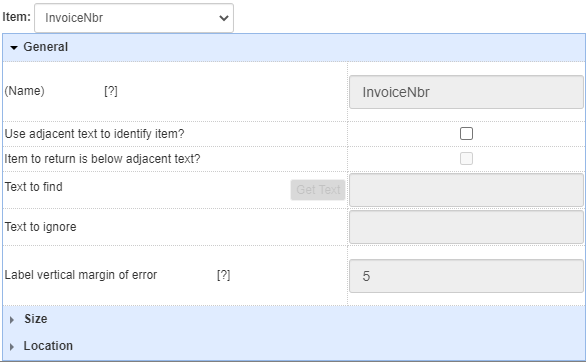
- Check the box next to Use adjacent text to identify item?.
- The Text to find, Text to ignore, and Label vertical margin of error entry fields will become available:
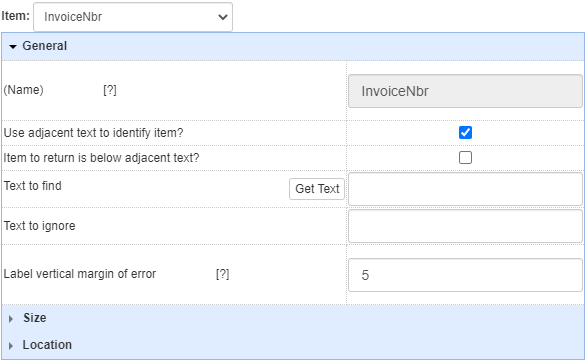
- The Text to find tells the system the text to use to identify the information being selected with the extraction box.
- Text may be manually typed into the entry field, or the Get Text feature may be used.
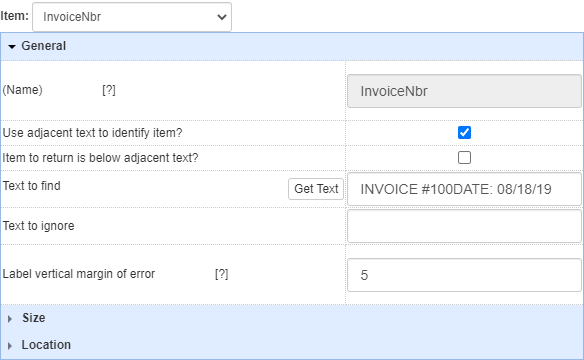
- When clicked, the Get Text button will review the extraction box and return all the text it finds. Using the feature will ensure the text in the entry field is formatted in the exact fashion the system will read it.
- When clicked, the Get Text button will review the extraction box and return all the text it finds. Using the feature will ensure the text in the entry field is formatted in the exact fashion the system will read it.
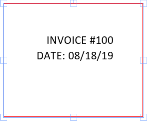
- Remove all text from the entry field until only enough text is needed to identify the required information. In the above example, all text except the INVOICE number is not needed.
- In instances where adjacent text within the extraction box is ambiguous, the Text to ignore entry field may be used.
- If, for example, within the extraction box for Invoice Date, both Invoice Date and Due Date exist. The Text to Find may be set as Date, and to avoid system confusion, Due would be entered in the Text to ignore field. When reviewing the extraction box, the system will now be able to differentiate between the Invoice Date and the Due Date and pull the correct information.
- In the event the information to be extracted does not align on the right exactly with its adjacent text if it is slightly above or below, the Label vertical margin of error entry field may be used.
- The Label vertical margin of the error entry field tells the system how many pixels above or below the adjacent text line may exist in the information to be extracted. The default setting is 5, which is sufficient for most circumstances, but it can be modified to increase the +/- range.
- When adding extraction boxes for Amount from the Distributions or Extra Distributions menu, additional optional fields are available: GL Account Assigned, Conditionally assign GL Account and Conditionally assign transaction code to apply to the amount.
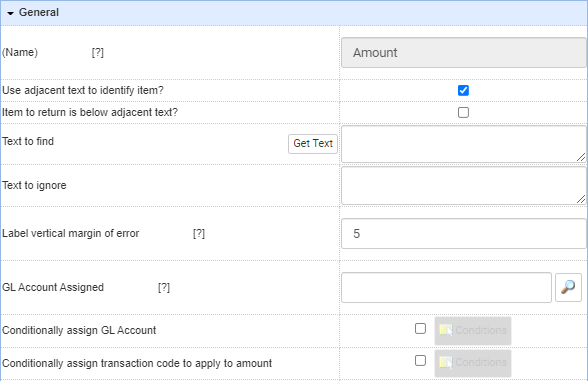
- GL Account Assigned
- Any GL account listed in this box will be used to extract the amount.
- Conditionally assign GL Account
- When the box is checked, the Conditions box will be illuminated.
- Click the Conditions box.
- The GL Account Conditions window will open.
- Click New to add a condition.
- Enter the GL Account to assign to the amount when the condition is satisfied.
- Highlight the Selection field and double-click or click Selection at the top of the window.
- A Page Item Selections window will appear.
- Click New to add a Page Selection instruction line.
- Follow steps 1-11 listed below in Saving a template page and adding Page Selections.
- Now, when running Capture, the system recognizes the page selection(s) and assigns the indicated GL account to the amount extracted.
- When the box is checked, the Conditions box will be illuminated.
- Conditionally assign transaction code to apply to the amount.
- When the box is checked, the Conditions box will be illuminated.
- Click the Conditions box.
- The Transaction Code Conditions window will open.
- Click New to add a condition.
- Select the Transaction Code to apply to the amount when the condition is satisfied.
- Highlight the Selection field and double-click or click Selection at the top of the window.
- A Page Item Selections window will appear.
- Click New to add a Page Selection instruction line.
- Follow steps 1-11 listed below in Saving a template page and adding Page Selections.
- Now, when running Capture, the system recognizes the page selection(s) and applies the selected Transaction Code to the amount extracted.
- When the box is checked, the Conditions box will be illuminated.
- If no Account extraction field is used, no GL accounts are conditionally assigned, and no transaction codes are conditionally assigned, when the Split Captured Distributions by transaction code is checked in Settings, the system will apply the selected transaction code to the amount extracted.
- GL Account Assigned


Locating information using adjacent text (below):
The following steps will describe how to use this process when the desired information lies below the adjacent text.
- Follow steps 1-3 for locating information using adjacent text (beside) above.
- Check the box for Item to return is below adjacent text?.
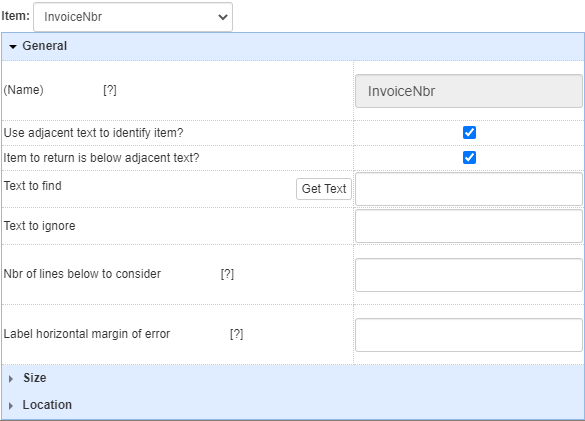
- This tells the system that the information to be extracted exists below the text entered in the Text to find entry field.
- Follow steps 5-8 for locating information using adjacent text (beside) above.
- The system will return all information below the adjacent text down to the bottom of the extraction box. To avoid extracting undesired text, indicate how many lines below the adjacent text the system should review in the Nbr of lines below to consider. Entering a value of 1, for example, will tell the system to review solely the first line of identified information below the Text to find.
- In the event the information to be extracted does not align directly below the adjacent text, if it is slightly to the right or left, the Label horizontal margin of error entry field may be used.
- The Label horizontal margin of error entry field tells the system how many pixels to the right or left below the adjacent text line the information to be extracted may exist.
- If extracting an amount, follow step 10 from location information using adjacent text (beside) above.

Settings (Adding Defaults)
The following steps will describe how to change system settings for your template page as well as set defaults for the vendor, transaction code, commentary, and/or invoice number.
- Click Settings from the menu bar.
- The Page Settings screen will display.
- The settings options are as follows:
- General Settings – default settings are pre-selected
- Capture Distributions Only – in the event your invoice is multiple pages and/or if information is needed from more than one invoice page, checking the box for Capture Distributions Only and selecting the primary vendor invoice template page will ensure that any information extracted will be added to the invoice created for the primary vendor invoice template page.
- Include Captured Image As Attachment on Entry – checking this box will result in the image being added as an attachment to the invoice created in SGA.
- Dft Vendor ID - by adding a vendor ID in this field, you are telling the system that any invoice created using this template page should be created for the specified vendor ID.
- Default Payment Card/Vendor – selecting a payment card or payment vendor will result in the invoice being created having the payment card/vendor assigned at creation.
- Split captured Distributions by transaction code – checking this box will result in the display of a selection dropdown containing transaction codes. The selected transaction code results in any amount extracted from the invoice being split among a GL distribution account or accounts based on its specified percentages.
- Append to/replace Comment – this dropdown indicates how the comment entered in the “Default Comment” entry field should be handled.
- Default Comment Replace Type:
- Append Before – the comment is added in front of any comment(s) extracted from the image.
- Append After – the comment is added after any comment(s) extracted from the image.
- Use when blank – the comment is added to all GL distribution account lines if no comment(s) is/are extracted from the image.
- Default Comment Replace Type:
- Insert variable – date variables selected are added to the Default Comment entry field. Based upon the physical entry date of an invoice created from the Capture process, the date variable(s) will be updated to reflect the correct information. For example, if @Fixed.MMMM@ and @Fixed.YYYY@ are added to the entry field and an invoice is entered in July 2021, the system will append “July 2021” to the comment field for all GL Distribution lines according to the append/replace option selected.
- Dft Approval Group (If Document Approval Activated) – This is the approval group that will be applied to invoices created through the Capture template page.
- Advanced Settings – default settings are pre-selected
- Dft PO Close Method – this dropdown establishes the default close selection made when a PO is referenced in an invoice batch during Capture.
- Replace invoice distributions with open PO distributions on parse – this setting tells the system to automatically pull all PO lines for a referenced PO onto the GL Distributions and replace any information extracted from the image. Append to/replace Invoice number - this dropdown indicates how the text entered in the Append/Replace text entry field should be applied to the invoice number entry.
- Replace Type:
- Append Before – the text is added in front of any invoice number extracted from the image.
- Append After – the text is added after any invoice number is extracted from the image.
- Use when blank – the text is added to the invoice number field if no invoice number is extracted from the image.
- Insert variable – date variables selected are added to the Append/Replace text entry field. Based upon the physical entry date of an invoice created from the Capture process, the date variable(s) will be updated to reflect the correct information. For example, if @Fixed.MMMM@ and @Fixed.YYYY@ are added to the entry field and an invoice is entered in July 2021, the system will append July 2021 to the invoice number field according to the append/replace option selected.
- Replace Type:
- Default File Name – the text entered in this field is used to name attachments applied to invoices created through Capture for the specified template. Variables may be included. The variable @Fixed.OriginalFileName@ will name the attachment using its original source document file name.
- General Settings – default settings are pre-selected
Saving a Template Page and Adding Page Selections
By saving your template page, you will store the settings and extraction boxes you have entered. The following steps will describe how to add Page Selections so the system knows how to identify when to apply your extraction instructions.
- Upon saving, the Page Selections screen will display

- Click
 to add a Page Selection instruction line.
 - Select the Page Selection type in the Column:
- By selecting Text in Image, you will be taken to the invoice image and provided with an extraction box to use to select unique criteria the system will use to identify the vendor invoice image format
- Place the selection box around an item that will help the system identify the invoice format, such as vendor name, account number, bill-to address, etc.
- Click OK.
- The Get Text process will run, extract all information contained within your selection box, and add it to the Value field
- The Comparison type tells the system the match to make when reviewing invoices and comparing their text to the Value. It is recommended that the Contains option be selected to increase the probability of a match.
- When critiquing the text in the Value field, you will want to ensure that enough information is included to assist with identification, but not so much that if any future invoice deviates slightly, there may not be a match.
- If you are creating multiple template pages for the same vendor image format for a utility provider whose invoices are to be driven to different GL codes based on a bill-to location, perhaps you may consider adding additional Page Selections. For example, including a page selection to locate a vendor name, Dominion Utility, and a second to locate an account number, 1234-G, will enable the system to differentiate between invoices received from the same vendor and apply different logic to each.
- When all Page Selections have been entered, click OK.
- You will be returned to the Edit Digital Invoice Template screen.
- If no other template pages are to be created or changes made, click Save.
- Your templates are now saved and will be used during the Invoice Capture process.

 to add a Page Selection instruction line.